How To Change a Background In Photoshop
Clipping path service is a well known technique to everybody. Clipping Photoshop is famous for photo editing and removing the background. It cuts the background of the photo that you need. The most common questions when it comes to Photoshop is, “How do I remove a background of a photo?” There are variations of it—how do I step someone to a different background, or alter the background—but the gist is the same. William N. Berry shows us how to extract the subject from one background and put it on another in Photoshop CC:
1. First, you will need to open the photo you wish to cut the background from in Adobe Photoshop. Also, have the photo of the new background ready.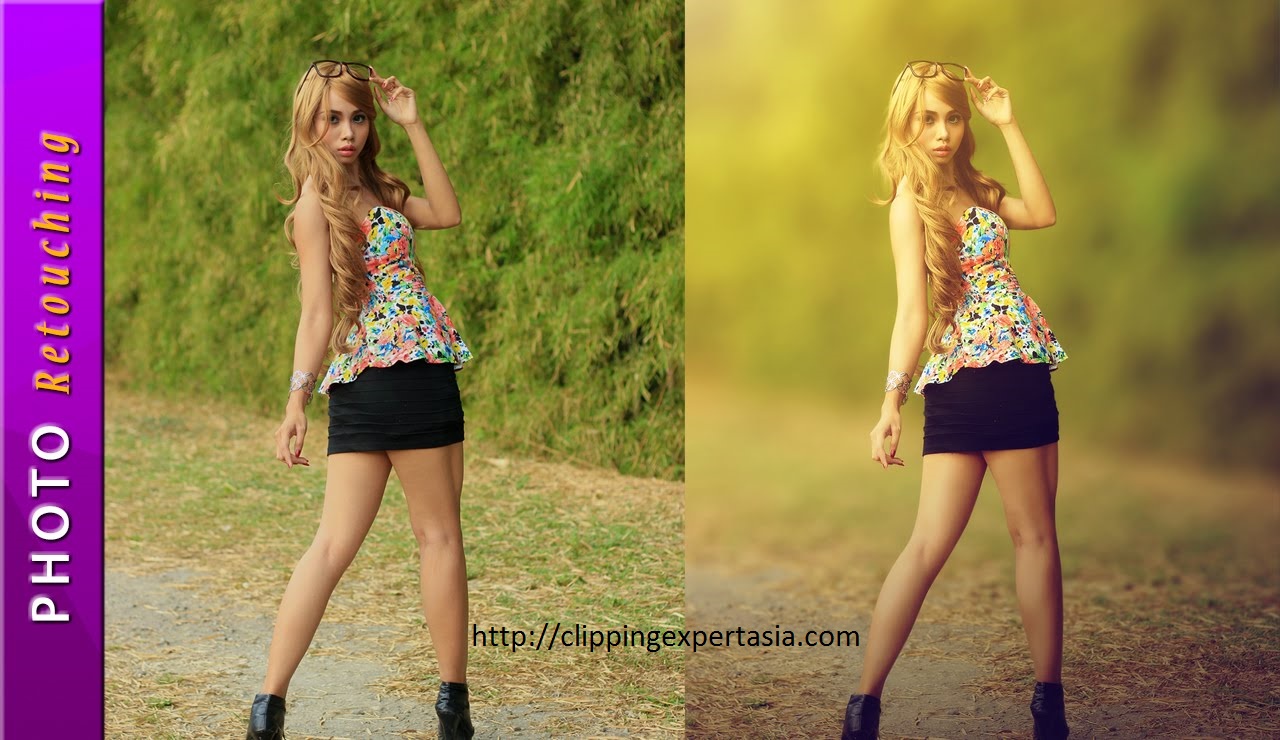
2. Grab the Selection Tool and pull the photo with your subject over to the new background. Most of the time, the photos won’t be the same size, so you can adjust the size of your photo in Free Transform by pressing Ctrl + T, then holding Shift while you pull the Transform box’s handles (Ctrl + 0 will bring the handles into view if they are off screen). Position the subject photo where you want, then press Enter to lock it in.
3. Next, you will need to make a selection. There are a lot of tools you can use like Magic Wand or Lasso, but for beginners, let’s stick with the Quick Selection tool. Select the parts of the photo you want to keep by running the tool over the photo to tell Photoshop what you fields you want to grab. If the tool grabs too much, don’t worry, you can hit and hold the alt key on your keyboard to cut anything you don’t want to keep.
4. After you’ve made the selection, you may finish it by clicking Refine Side at the top of the screen to remove the background.
Other, perhaps easier, way to do all of this in Photoshop CC is to go to Select – Focus Fields (this works very well when the subject is in focus and the background is out of focus). If the tool misses anything that you wanted to keep, just select those fields and Photoshop will recalculate the selection.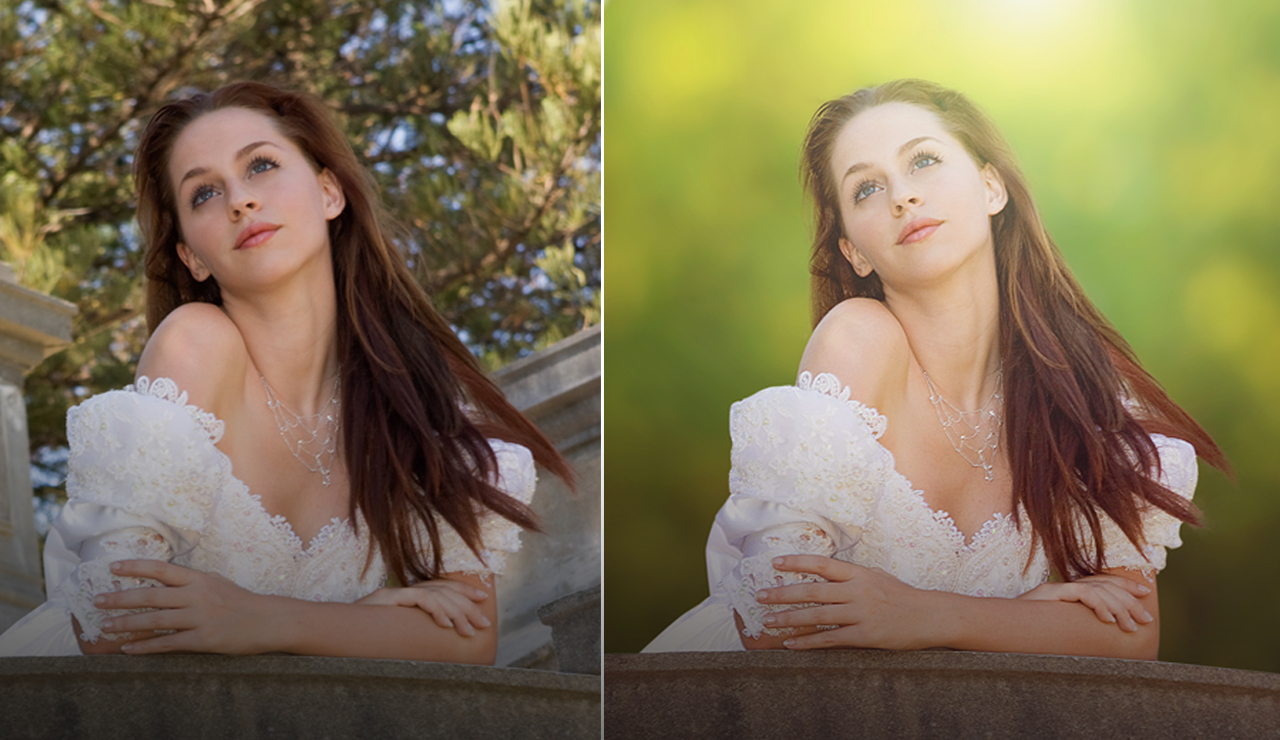
You can over this method the same way as if you were to use the Quick Selection tool, and that’s with Refine Side, which this time can be found in the Focus Field box. At this point, you can make adjustments to clear up the final photo, like adjusting the radius slider to pick up stray hairs and removing the background between them.
Both of these methods are pretty simple to begin with, but the more distinct your subject is from the background, the easier it will be for Photoshop to create the selection. So, choose your photos wisely!
----------------------------------------------------------------------------------------------------------------------------------------------------------------------------------------------------------------------------------------------------------------------------------------------------------------------------------------------------------------------
Clipping path service
Are you looking for best clipping path service? Are you also interests the latest photo editing services? If the answers to these questions are yes, you require to stay at offshore clipping path and tell them all that you need. Offshore clipping path is famous for photo editing. It cuts the background of the photo that you need. Offshore clipping path is the biggest United State of America based Post Production Company. We provide fully digital photo editing services to E-commerce, Photographers, Production Companies, Online Store, Big-Branches, Digital Studios and Agencies. Our services are Clipping path, Multi Clipping Path, Neck Joint, Drop Shadow, Photo Masking, Photo Retouching, Photo Color Correction, Victimization and so on.
Clipping Path Service Is Our Extra Priority:
At Offshore clipping path, you will get all the services that you need at any time of the day. We offer our services 24 hours basis because we are not certain of the day, the hour or the minute you will need them. Day by day the use of Offshore clipping path is increasing. We are aware that there are loads that are urgent or those that are bulky and which must be done by pointed deadlines. What I need to tell you is that at OCP we have the capacity to maintain any volume of work. We have a team of designers and they are skilled and who will follow your instruction and deliver to you pieces of work that meet the expected standards .
Background Removal and Clipping Path Service We do via Photoshop Pen Tool:
To offer the latest background removal service, we use pen tools in photo editing. We use it in Design, Photoshop and illustrator to assure that we give you a job that is well done. If you want photos cut from the background, we make use the background removal services to give you correctly what you are looking for. For editing your photos we also use pen tool techniques as well as making for an outline. The photo industry is growing rapidly. So if you want to the best photo contact with us because we are making your photos the best. We offer these services to a big range of the people including advertising agencies, website design, graphic design and so on .
If you want to have a appointed background removes, want to carry out photo manipulation, photo manipulation you can believe OCP for wonderful services.
Our working experience
- We have 22 expert designers.
- 3 steps quality control.
- 24 hours operation running.
- Able to doing any kind of complicated work with highest quality.
- Our maximum turnaround time 24 hours.
- We are able of doing 500-1000 clipping path a day.
- Special offer for bulk photos.
- 24/7 online support.
At offshore clipping path we have a expert graphic artistic who are self motivated. So don’t worry, try us now and see the difference.
Are you looking for best clipping path service? Are you also interests the latest photo editing services? If the answers to these questions are yes, you require to stay at offshore clipping path and tell them all that you need. Offshore clipping path is famous for photo editing. It cuts the background of the photo that you need. Offshore clipping path is the biggest United State of America based Post Production Company. We provide fully digital photo editing services to E-commerce, Photographers, Production Companies, Online Store, Big-Branches, Digital Studios and Agencies. Our services are Clipping path, Multi Clipping Path, Neck Joint, Drop Shadow, Photo masking, Photo Retouching, Photo Color Correction, Victimization and so on.
Clipping Path Service Is Our Extra Priority:
At Offshore clipping path, you will get all the services that you need at any time of the day. We offer our services 24 hours basis because we are not certain of the day, the hour or the minute you will need them. Day by day the use of Offshore clipping path is increasing. We are aware that there are loads that are urgent or those that are bulky and which must be done by pointed deadlines. What I need to tell you is that at OCP we have the capacity to maintain any volume of work. We have a team of designers and they are skilled and who will follow your instruction and deliver to you pieces of work that meet the expected standards .
Background Removal and Clipping Path Service We do via Photoshop Pen Tool:
To offer the latest background removal service, we use pen tools in photo editing. We use it in Design, Photoshop and illustrator to assure that we give you a job that is well done. If you want photos cut from the background, we make use the background removal services to give you correctly what you are looking for. For editing your photos we also use pen tool techniques as well as making for an outline. The photo industry is growing rapidly. So if you want to the best photo contact with us because we are making your photos the best. We offer these services to a big range of the people including advertising agencies, website design, graphic design and so on .
If you want to have a appointed background removes, want to carry out photo manipulation, photo manipulation you can believe OCP for wonderful services.
Our working experience
- We have 22 expert designers.
- 3 steps quality control.
- 24 hours operation running.
- Able to doing any kind of complicated work with highest quality.
- Our maximum turnaround time 24 hours.
- We are able of doing 500-1000 clipping path a day.
- Special offer for bulk photos.
- 24/7 online support.
At offshore clipping path we have a expert graphic artistic who are self motivated. So don’t worry, try us now and see the difference.
How to make Portrait’s skin smooth in Photoshop
With the help of Photoshop’s High Pass filter, you can easily make your portrait’s skin smooth and silky. Follow our guideline step by step to get the best output. If you need any help to do retouch or other related service, check out here to get photo retouching services.
Well- known and pro retoucher will spend lots of hour with Photoshop CS6 for working on their model’s skin. They use the clone stamp tool and healing tool to remove every imperfection from their model’s portrait. But it takes more time by using those two tools.
As we don’t have much time or patience, we always seeking a shortcut way to do the work within a short time. Fortunately, there is a shortcut option in Photoshop CS6 to make our portrait’s skin smooth. And the shortcut method is the high pass method. This method is useful and helps us to get beautiful model’s skin.
In below, we discuss this shortcut method step by step. Let see the below guideline step by step. If you want to give juice to your work, use Gaussian Blur a little bit. You can find this by going Filter> Blur> Gaussian Blur. Apply this step between two and three steps, if you want to make the smooth more strength and beautiful.
Step 1. Choose an image and copy the layer
First, take a model’s image from your gallery you want to work. If you don’t have an appropriate image or lack of model’s image, search on Google. Thousands of model image are available on Google. From Google, download 3 to 5 best image and select the best from those images. Then, open the image in Photoshop.
Next, make a copy of the layer. To make a copy, hold Ctrl + J. After copying the layer, hold Ctrl + Shift + Alt + E to make the merge of the copy. Then, change the layer name to High Pass. And then, choose overlay by clicking Blend Mode.
Step 2. Overlay and High Pass
In this step, you need to set radius. Keep the radius 9 pixels and click ok. By doing this, your portrait’s seems to be sharp. But if you want to make your model’s skin soft, invert the high pass’s layer. To invert it go to Image> Adjustment> Invert. The shortcut of this option is Ctrl + I. If you complete this step, ready to go step 3.
Step 3. Smooth the skin
It is the last and final step. To get a better result, complete this step correctly.
In this step first, add a layer mask. For adding a layer mask, press Alt and click on the add layer mask icon. You can find this under the layer panel. It helps you to hide the softening effect completely.
Now, take the Brush tool from the toolbar menu and select soft edge brush tip. Then, choose white color and paint over the portrait’s skin to bring to light High pass layer.
Now, look at your portrait’s image. The skin of your portrait’s image looks very beautiful, soft, and smooth.
Conclusion
High Pass method is beneficial and takes concise time to make the model’s skin smooth. Follow the above 3 guidelines and apply it. By applying it in your work, you will make the job within a concise time.
--------------------------------------------------------------------------------------------------------------------------------------------------------------------------------------------------------------------------------------------------------------------------------------------------------------------------------------------------------------------
3 Simple tricks to do color correction in Photoshop
3 Simple tricks to do color correction in Photoshop
Maybe you edit a photo and do your best to make it colorful and vibrant. But sometimes you may feel that the work you have done would be great if there was something different change in color. You are facing this problem when you work with a product or any clothing fabrics. Maybe the color of the photo is beautiful in real life but in the photo it is quite irritating. That’s why you need to do color correction for bringing life to the photo. If you need color correction service, Visit on Clipping Expert Asia.
In this article, I am going to share 3 simple and easy tricks to do color correction in Photoshop. Hope, you will love this tip for doing the color correction yourself. Let’s have a close eye to look the three tricks that make your work fruitful.
Step 1
Open an image in Photoshop you want to edit. Then, open the layers panel by going to Windows> Layer. Next, open the adjustment panels by clicking on Windows> Adjustment.
Step 2
From the Adjustment panel, tap on the Hue and Saturation tool. This will make a new layer in the layers panel. Here, in the layers panel, click twice on the thumbnail of the hue and saturation layers which will bring a windows look like the below screenshot. You can change the values with the help of the sliders if you need.
Step 3
The image I used in this tutorial needs to change the color to make it real and vibrant. So, according to your needs, begin to change the values of the sliders in the Hue. Now, you can see the color in your image is being changed. Do it continuously until you get the perfect color. In saturation, do the same thing you did in the Hue to make your photo color strong and paler. But be careful, not do it too much that makes your photo unnatural and fake. However, it is hilarious and exciting to work with Hue and Saturation.
Here, the simple tricks that I used to make the photo effects real and natural. Hope, you will enjoy the three tips and tricks when you work with these in Photoshop.
If you are quite busy to do it yourself, leave it for us. We have an expert team to do color correction so click here. We also do all kinds of photo editing work at an affordable price. Click here for getting all the information about us.


